How to make raspberry-red currant mead
Every year I make at least five gallons of red currant-raspberry mead (technically, it’s called red currant-raspberry melomel, but whatever). Anyhow, I thought I would share my recipe and my process. The end result is a sweet mead that strongly brings out the flavors of currants and honey.
The recipe (for five-six gallons):
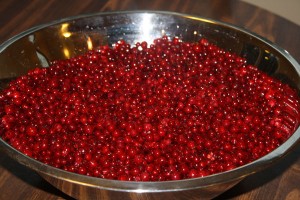
- Ten pounds of currants
- Five pounds of raspberries
- Fifteen pounds of honey
- Yeast nutrient
- Pectin enzyme
- Bordeaux yeast
Supplies:
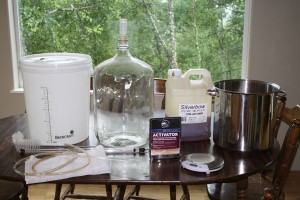
Though you don’t need absolutely everything on this list, I consider the following things critical when I make my mead. All of these supplies can be picked up at your local home-brew shop or any number of online retailers.
- 1 seven gallon primary fermenter (plastic bucket)
- 1 six gallon carboy
- Large nylon straining bag
- Food processor
- Kitchen Scale
- Some sort of sterilization solution (I usually use the iodine-based stuff from the brew shop)
- Siphon hose
- Air lock
- Five gallon stainless steel pot
The Process:
1. Clean and wash your berries. Remove all bad berries and stems. This can take a long time.
2. Place your berries in a food processor or blender. Make sure most of the berries’ skins are broken.
3. Put your berries and honey into the stainless steel pot. Add water (a gallon or two). I find it best to prepare half a batch at a time.
4. Heat your solution (or “must”), to 145 F. Keep it there for fifteen minutes. Do not boil! You want to pasteurize the must without releasing the pectin in the berries. I do this instead of adding Camden tablets (sulfites) to kill any naturally occurring yeasts and bacteria.
5. Line the primary fermenter with your large nylon straining bag. Pour your must into the bag.
6. Fill the rest of the fermenter with cold water until you have five gallons of water total.
7. Once the must has reached room temperature, add yeast nutrient and pectic enzyme. Add your yeast and stir thouroughly.
8. Stir down daily. After a week, siphon (or “rack”) your mead into the secondary fermenter (glass carboy). Add an airlock and leave it for another month.
9. I usually rack my mead an additional 2-3 times. I don’t want my mead sitting with a bunch of dxead yeast cells for too long, for fear that it will affect the flavor of the finished mead.
10. Bottle your mead. An Important Note On Bottling: I often bottle my mead 3-4 months after having brewed it. However, that’s really too soon. It leaves a lot of unfermented sugars in the mead and carbonates the mead, making it a sweat, if weak, sparkling mead. If you bottle it this soon, use beer bottles! It will explode your corks! It’s best to leave it in a cool, dark place with little to no dead yeast in the bottom for a year or so.


[…] just put up my recipe for making mead. We finished picking 20lbs of wild currants about a week ago, and I have my first of two six gallon […]
[…] you don’t know how to make your own wine, go my tutorial here. Just adapt the process for these recipes. Comments […]