The Birch Table.
A year and a half ago, I embarked on the ambitious project of building a table out of the birch trees on our property. While I’ve built my own house, I’ve never had much experience with woodworking.I should stop here to explain the reason for this new table. Our dining room is not very wide, but with a family of five and the desire to entertain, we wanted a table that fit the space. Plus, it’s pretty damn cool to have a table made from your own trees. We decided we wanted a table about 40″ wide and about 8 feet long. That’s what we ended up with.
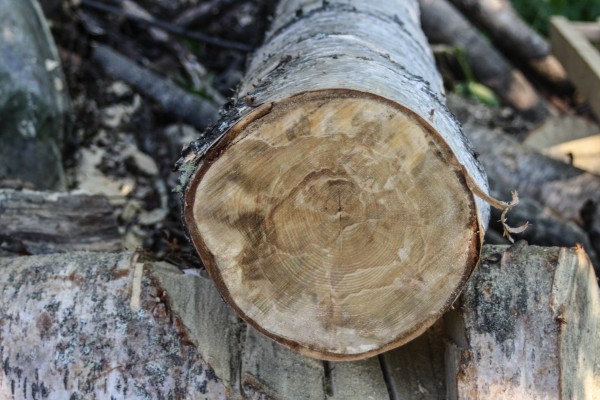
The first step was to buy a chainsaw mill and start milling the trees, most of which had been felled the year before. Milling was one of the most time-consuming but satisfying parts of the process. To take a tree, to turn it into lumber, and to reveal the surprising character of the grain is an exercise in patience and discovery. I took the logs (none of which are very big here in Alaska) and cut them into 8 ft sections. The first step in milling the log is to set up guides and make the initial cut. I did this with a couple straight 2x4s, joint hangers, and a level. I marked my first cut, put the guides in place, and cranked up the chainsaw.
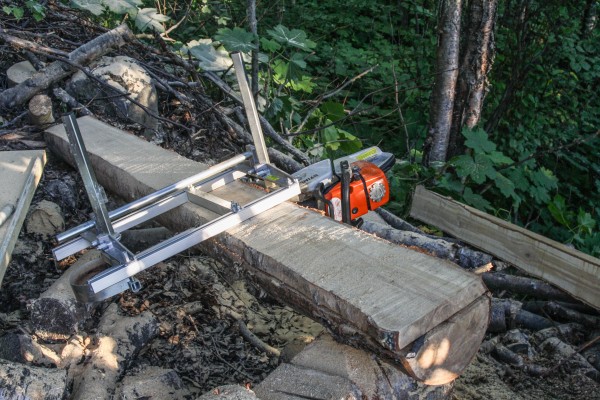
After the first cut, the next step is the vertical cut. Here I used a “mini-mill” attachment for the chainsaw. The mini-mill runs along a 2×6 that has been outfitting with an aluminum guide. After the two sides were completed, I switched back to my regular mill to make the remaining cuts and to slab the wood. I cut most of my wood for the tabletop into 2×6 dimensional lumber. The lumber definitely came out rough-cut and not entirely square, but I used a planer and jointer to fix my mistakes.

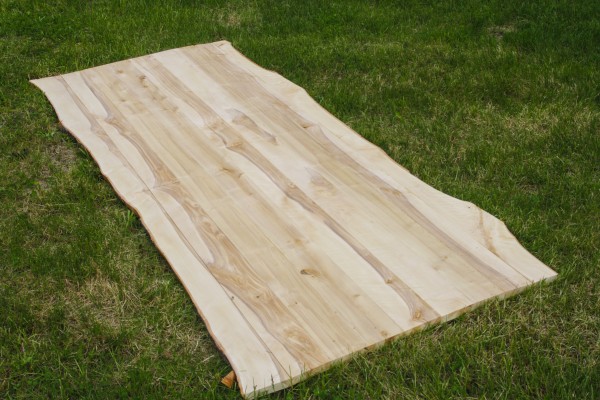
After I had what I thought would be enough lumber for the table top, I cut two slabs of birch with the bark and edge still on. These would become the edges of my table. I learned that if one wants to keep the birch bark on the wood, one should cut the trees in the winter then there is little moisture in the outer layers of the tree. Otherwise, as the wood dries, the bark and wood separate. I learned this the hard way, and had to live with table edges that did not include the bark.
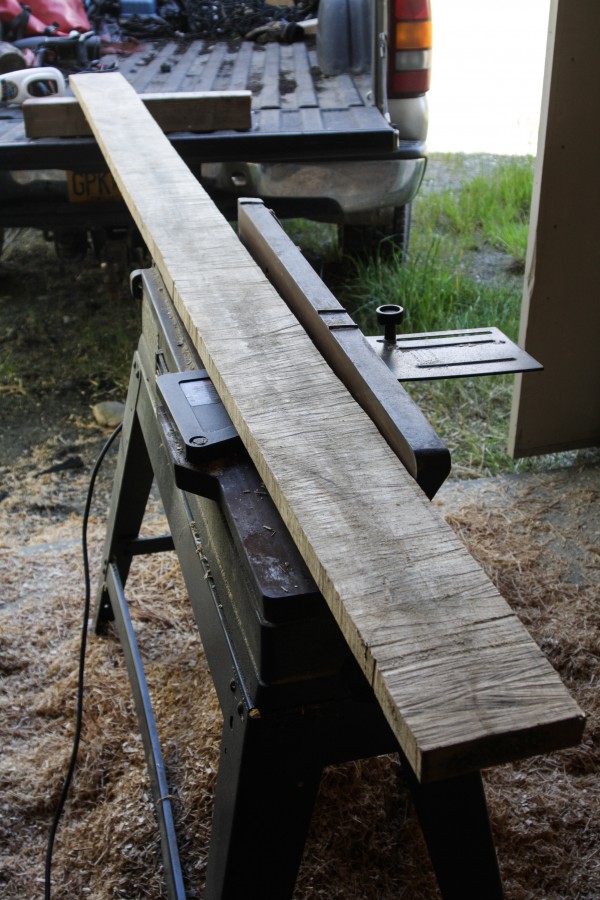
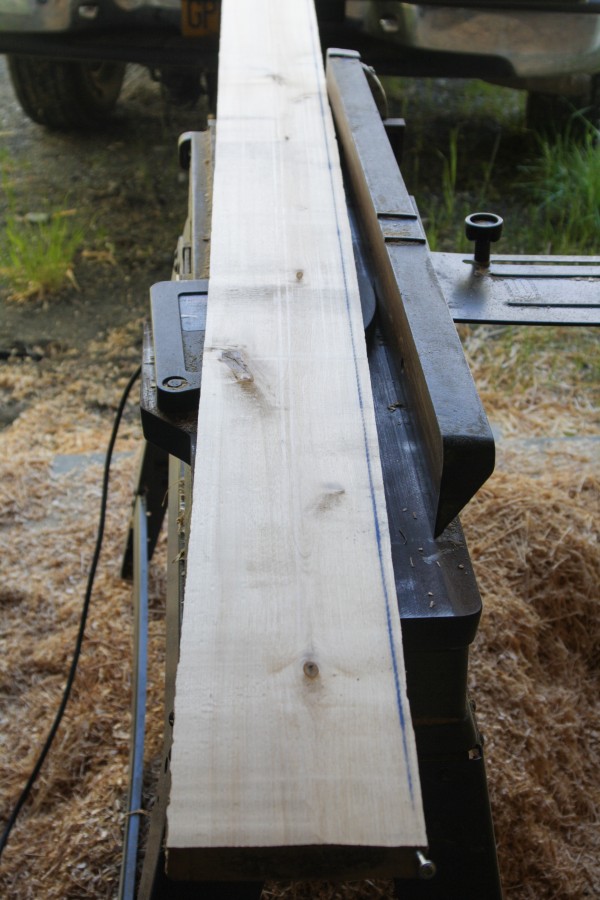
After all the wood was cut, I had to dry it. I brought it to my dad’s barn, where I stacked the wood, then weighted it down. The wood sat there for a year, and when I came back this summer, the wood was quite dry. I began the process of squaring the wood with a jointer, a table saw, and a planer. One of the miscalculations I made was how much material I would have to take off of the wood get them square. I intended to make the table top 1.5″ thick, with planks 5.5″ wide. I quickly realized I needed to take off far more material to get the pieces square. Even though I cut the wood with a 1/2″ of extra thickness, I ended up with planks that were only an inch wide, and about 5 inches wide.
After the planks had been planed, I went about the process of joining them. I used the combination of a Kreg jig, wood glue, and pipe clamps to join the planks. In hindsight, I should have paid more attention to the direction of the grain (as I hear it helps keep the tabletop flat). By the time I had connected most of the planks, there was a noticeable bow starting to show in the table top.
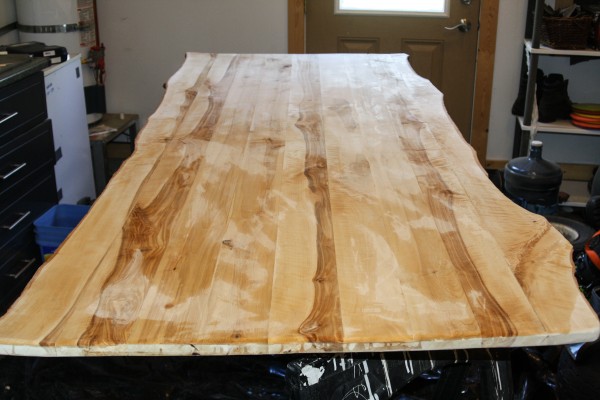
Notice the bow. This was before I re-straightened and replaced the end pieces.
I ended up taking the two edge pieces off, snapping a line, and carefully using a circular saw to re-straighten the edges of both boards. This seemed to help. My next step was to create the frame and legs. I didn’t have the lumber to do this from my seasoned lumber, but I had some logs still on my property from the summer before. Once again I found myself on the mountainside, milling lumber. I made a basic frame with 2×4 lumber I milled, and created simple 4″x4″ legs for each corner. I put a few layers of polyurethane on the frame and called it good.
The next step, and perhaps the most stressful, was pouring the epoxy on the table. I sanded the tabletop, added several layers of polyurethane, and grabbed a gallon of epoxy from the local hardware store. I set the tabletop in a small room without dust, spread plastic everywhere, and started the pour. 1 gallon was just barely enough to cover the surface, and it my stress to make sure the table was properly covered, the pour ended up being uneven. It left small dimples on one side of the table. I used a torch to pop the bubbles in the epoxy and called it good, though I was still dissatisfied with the dimples. I left the tabletop to cure for several days, then connected it to the frame.
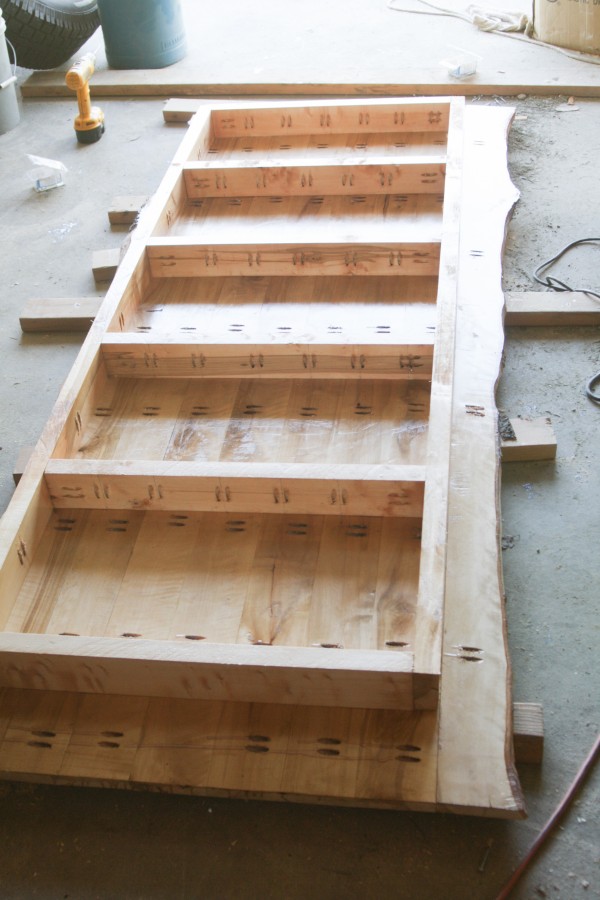
When in doubt, use the Kreg jig. A lot.
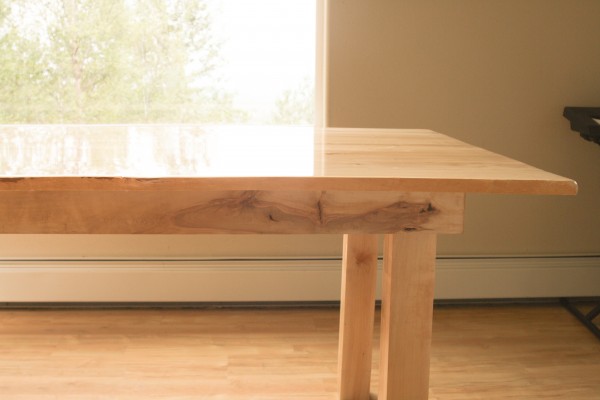
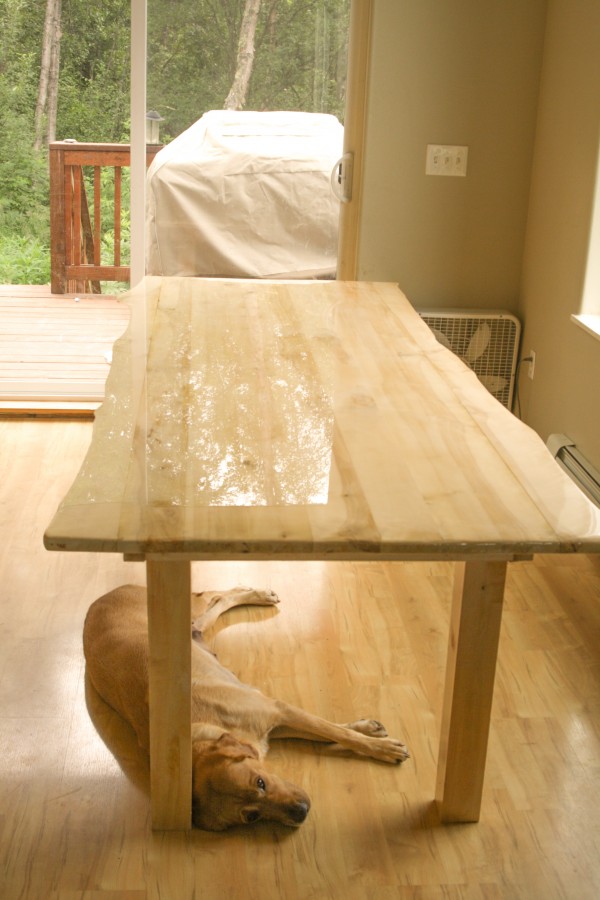
I used simple 4″ x 4″ legs which I attached to the bottom of the frame when I brought the table home. The finished product looks something like this:
After we got the table home, I was still unhappy with the dimples in the epoxy from my first pour. In addition, the epoxy was still curing and the kids managed to scrape it up pretty bad. I decided to do a second epoxy pour, which ended up far better than the first one. We’re still using mismatched chairs with the table but that’s next summer’s project: small bench seats made from half-rounds of birch. It should be a fun challenge.